The flat I rented in Leeds had a galley kitchen in the rear return — about 1.9 metres long, units down both sides, and a gap in the middle you could just about turn around in with the oven door shut. For the first year I moaned about it. It was dark, both walls were solid cupboards floor to ceiling, and if my flatmate was making toast I couldn’t get to the fridge.
Then I actually looked at what was wrong, and it was three specific things, not “the kitchen is too small”. The gap was fine, it was the light. One wall didn’t need to be closed cupboards. And nothing used the vertical space above the worktop. A weekend of paint, a shelf, a rail and two strip lights later, it was the kitchen I’d cook in by choice.
A galley kitchen is the most efficient layout there is — everything is one pivot away. The problems are almost always the gap being wrong, both runs being heavy and closed, and bad lighting. Here’s how to lay one out and fix those, most of it without touching the units.
What Counts as a Galley Kitchen?
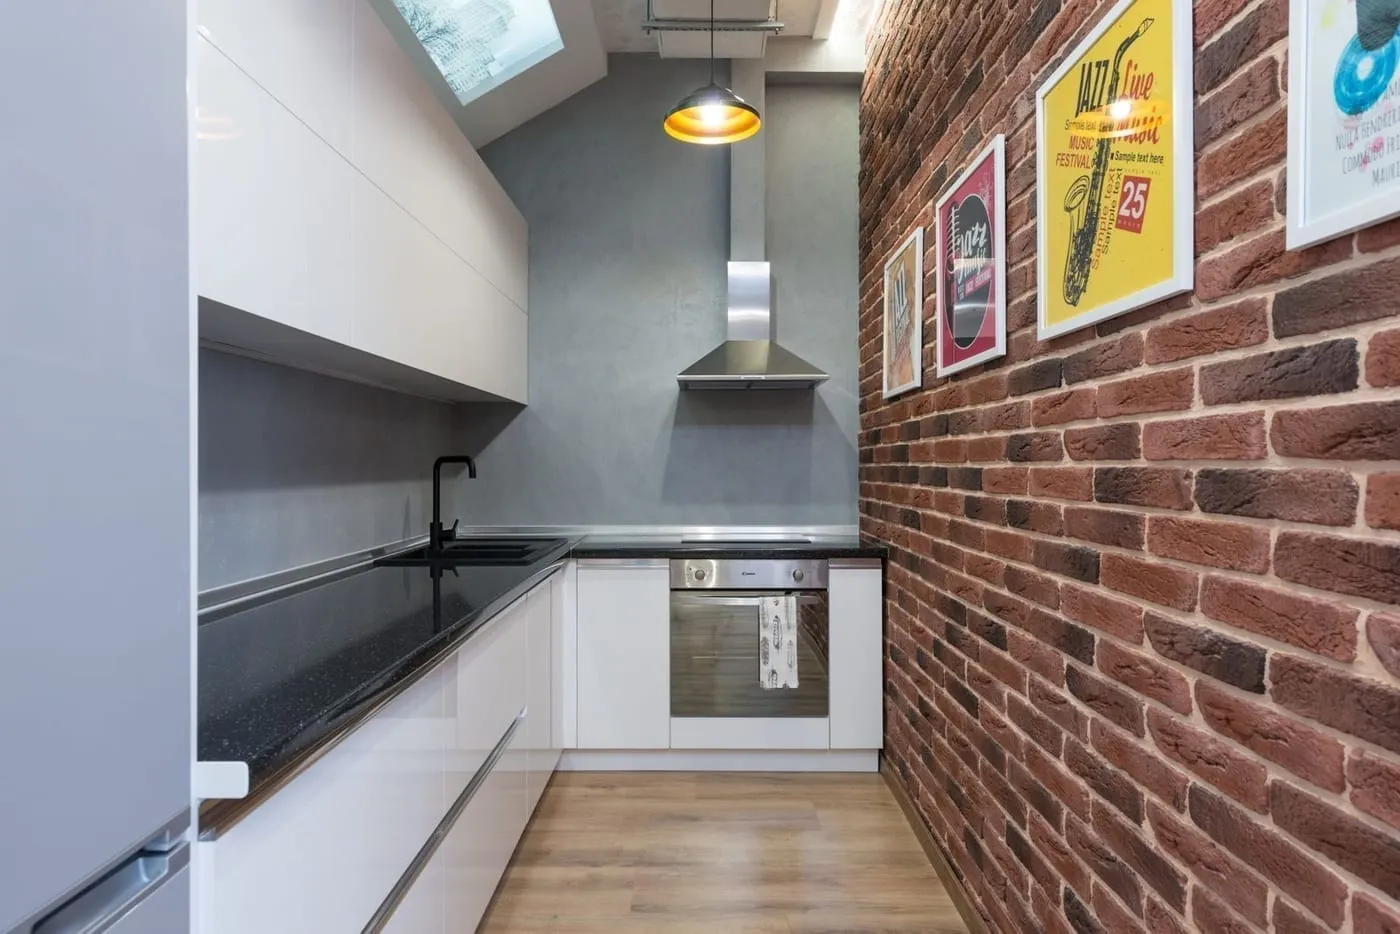
A galley kitchen has worktop and units along two parallel walls with a walkway between them. A version with units on one wall only and a clear walkway opposite is a single galley.
It’s the default shape for a lot of British homes:
- Flat conversions — the kitchen is often a narrow room carved off the back of a larger space.
- Victorian and Edwardian terraces — the rear return (the bit that sticks out into the yard) is usually a galley, 1.7 to 2.4 metres long.
- Ex-local-authority flats and maisonettes — galley kitchens off a hallway, frequently under 5 square metres.
- New-build flats — a galley or single-galley kitchen along one side of an open-plan living space.
The length varies but the width rarely does: a galley is defined by being too narrow for anything down the middle. That constraint is also its strength — you’re never more than two steps from anything.
How Do You Lay Out a Galley Kitchen?
Put the wet and hot jobs on one run and the dry and cold jobs on the other, and protect the gap between them.
The gap comes first. Measure it before you plan anything else:
- 1200mm is the target. Two people pass, and a dishwasher, oven or fridge door opens fully without hitting the units opposite.
- 1000mm works for one cook who doesn’t mind stepping back when a door is open.
- Below 900mm, an open appliance door blocks the whole walkway and you physically can’t get past. If that’s your kitchen, take units off one wall entirely and run a single galley with a slim shelf, a rail, or nothing opposite.
Then split the two runs by function. The old “working triangle” — sink, hob, fridge in a loose triangle — still holds in a galley, just stretched along two lines:
- One run: sink, dishwasher, hob, oven. Plumbing and gas or the cooker circuit are usually already on this wall; keep them there. Prep space to one side of the sink.
- Other run: fridge, tall larder unit, and a clear stretch of worktop. This is where shopping lands and where you actually chop.
Working this way you turn on the spot between the two runs rather than walking the length of the kitchen with a hot pan. For a fuller walk-through of planning a small kitchen from scratch, kitchen on a budget UK covers the order to do things in.
What Are the Best Storage Ideas for a Galley Kitchen?
Use the walls and the ceiling. A galley has two full runs of wall and usually decent height — that’s a lot of storage that doesn’t cost you any walkway.
- Wall units to the ceiling on one run. Standard wall cabinets leave a 30 to 40cm dead gap above that collects dust. Taking units (or adding a topper cabinet, from about £30) to the ceiling on one side turns that into cupboard space for things you use twice a year.
- A shelf above the worktop on the other run, instead of wall cabinets. It holds everyday plates, mugs and oils within reach and keeps that side visually light so the room doesn’t feel boxed in on both sides.
- A rail along the splashback. An IKEA KUNGSFORS or HULTARP rail, or any screw-fixed rail (£8 to £25 per run), gets utensils, a knife strip, hooks and a small basket off the worktop.
- The back of the door. An over-door or screw-mounted rack holds tea towels, foil, cleaning spray and a chopping board.
- A tall pull-out larder in place of one base-and-wall stack. A 300mm pull-out holds more than a 600mm cupboard you have to unpack to see into.
Our small kitchen storage ideas on a budget UK goes through the cheap versions of each of these in more detail.
How Do You Make a Narrow Galley Kitchen Feel Bigger and Lighter?
Keep the lower run one continuous colour, open up one wall, run the flooring lengthways, and light the worktop properly.
A galley feels like a corridor when the eye keeps hitting edges and shadows. Smooth them out:
- One colour on the base units and worktop, carried the full length of both runs. A pale, continuous line down each side makes the room read as longer, not shorter. Save any contrast colour for the wall above or a single tall unit.
- Open shelves on at least one run. Two solid walls of cupboard to the ceiling is what makes a galley claustrophobic. Swapping one side’s wall cabinets for open shelves or a plate rack lifts the visual weight. Unfitted kitchen ideas UK leans into this look with freestanding and open pieces.
- Floorboards or planks laid lengthways, down the room rather than across it, pull the eye to the far end and make the space feel deeper.
- Under-cabinet lighting. The single biggest change in my rented galley. Wall cabinets throw the worktop into shadow; a strip of LED underneath (stick-on battery or plug-in, £10 to £30 a run) puts light where you chop and makes the whole kitchen feel less like a cupboard.
- A larger splashback tile or a sheet splashback rather than small mosaics — fewer grout lines is calmer in a tight space.
What Can Renters Change in a Galley Kitchen?
Almost everything that matters, without touching the carcasses. A galley is small, so a small budget goes a long way.
- Paint the doors and frames with a cabinet-specific paint (Rust-Oleum, Frenchic, Johnstone’s — about £20 to £30 a tin, enough for a galley). Degrease, light sand, two coats. This is the change people notice first.
- Swap every handle. A galley might have 12 to 16 handles; at £2 to £5 each that’s £30 to £70 to completely change the feel. Keep the originals in a bag for moving day.
- Peel-and-stick splashback. A galley run is short, so £15 to £40 of vinyl tile or a splashback panel covers it. Comes off with a hairdryer and slow peeling.
- Tension rod and clip-on lights. A rail along the splashback and stick-on under-cabinet LEDs — no drilling, both reversible.
- A freestanding shelf unit or trolley at the open end of the galley for the storage the units don’t give you.
For the full renter kit and what’s worth doing in a rented kitchen, rental kitchen upgrade ideas UK has the complete list.
What’s the Budget for a Galley Kitchen Refresh?
This is a renter-safe refresh of an existing galley — no new units, nothing that needs a landlord’s sign-off:
| Item | Cost (approx) |
|---|---|
| Cabinet paint (1–2 tins) + roller kit | £30–£60 |
| New handles (12–16) | £30–£70 |
| Peel-and-stick splashback for one galley run | £15–£40 |
| Splashback rail + hooks (both runs) | £16–£50 |
| Stick-on / plug-in under-cabinet LED strips (both runs) | £20–£60 |
| One shelf above the worktop | £10–£25 |
| Freestanding trolley or shelf unit for the end | £20–£60 |
| Total | £140–£365 |
Do the lighting and the paint first — between them they fix the two things that make a galley feel grim. The handles and splashback are the finish that makes it look deliberate rather than patched.
Related reading
Frequently Asked Questions
A galley kitchen is a narrow kitchen with units and worktop along two parallel walls, with a walkway down the middle — named after the long, tight kitchens on ships. A one-wall kitchen with a walkway and no units opposite is sometimes called a single galley. It's the most common kitchen shape in UK flats, Victorian terrace rear returns, and ex-local-authority maisonettes.
The gap between the two runs should ideally be 1200mm, which lets two people pass and every appliance door open fully. 1000mm works for one cook. Below about 900mm, a dishwasher or oven door blocks the whole walkway when open and you can't get past — at that point you're better off with units on one wall only and a slim shelf or nothing opposite.
Keep the lower units and worktop one continuous pale colour so the eye runs the length of the room without stopping. Replace wall cabinets on at least one side with open shelves to lift the weight off the walls. Lay flooring boards lengthways down the room. Add under-cabinet lighting so the worktop isn't in shadow, and take wall units to the ceiling on the other side rather than leaving a dust gap.
Rarely a standing table — the walkway can't spare the width. What works is a drop-leaf table fixed to the end wall or a short breakfast bar on the end of one run, 25 to 30cm deep, with two stools that tuck fully under. If the galley is open at one end into a living room, put the table just outside the kitchen in that zone instead.
Paint the cabinet doors and frames with a cabinet-specific paint, swap every handle, and add a peel-and-stick tile splashback (£15 to £40 for a galley run). Put up a tension or screw-fixed rail along the splashback for utensils, add one shelf above the worktop, and fit clip-on or stick-on under-cabinet LED strips. That is under £120 of materials and a weekend, and none of it stops you reinstating the kitchen when you leave.